The sheer exhilaration of zooming through the air on a zip line makes it one of the most sought-after outdoor activities. If you have ever dreamed of having your very own zip line, this guide will walk you through the essential steps to safely and effectively build one in your backyard or property. Let’s dive into the adventure and learn how to make a zip line, ensuring a thrilling yet secure experience for all.

What Do You Need to Make a Zip Line?
Essential Equipment and Materials
Before you begin, gather all necessary equipment and materials:
1. **Steel Cable:** The main line which will carry the weight of the rider. Ensure it is of high-quality and rated for exceeding the expected load.
2. **Turnbuckles:** To adjust the tension of the cable.
3. **Pulley:** To glide smoothly on the zip line.
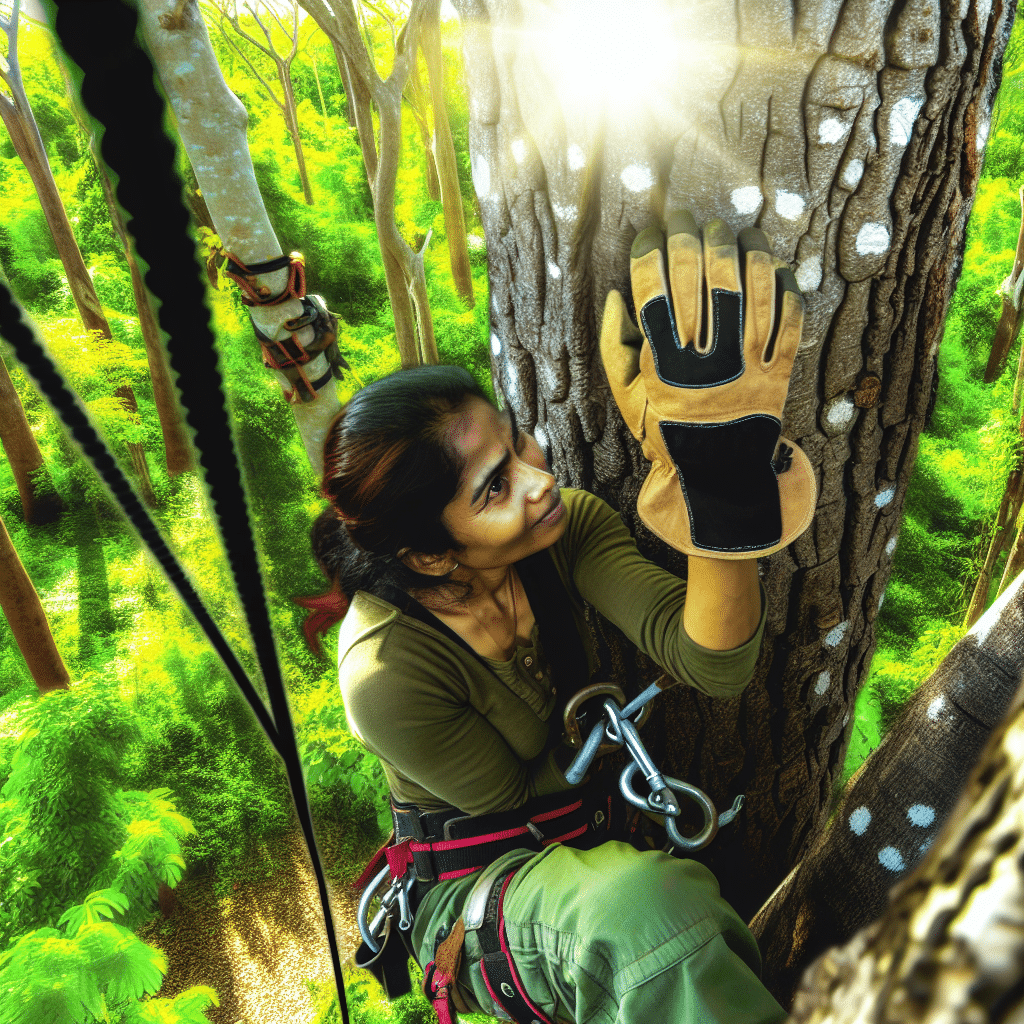
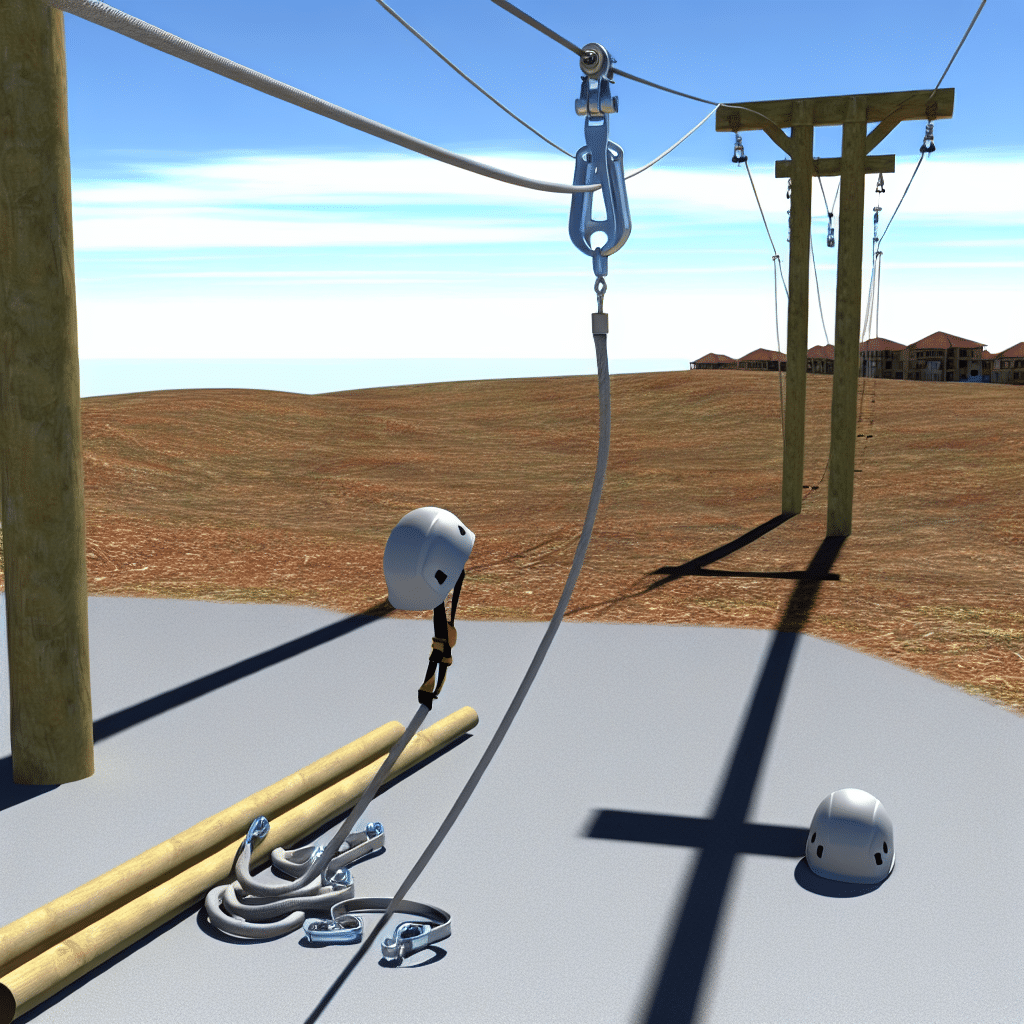
4. **Harness and Helmet:** For safety, a proper harness and helmet are crucial.
5. **Carabiners:** Heavy-duty carabiners for attaching the harness to the pulley.
6. **Anchoring Equipment:** Strong trees or posts to anchor the zip line.
7. **Sling or Padding:** To protect the trees if you are anchoring to them.
8. **Brake System:** To slow down and stop the rider at the end of the line.
9. **Tools:** Wrenches, drills, and wire clamps for assembly.
Choosing a Safe Location
Location is paramount when setting up a zip line. Select a spot with ample open space, minimal obstacles, and a gentle slope to aid in natural riding momentum. Avoid areas with heavy foot traffic or overhead hazards such as power lines or tree branches.
How to Install a Zip Line: A Step-by-Step Guide
Step 1: Determining the Course
– **Measure the Distance:** Use a measuring tape to determine the length between the two anchor points. Ensure there is adequate height at the starting point to allow for a smooth descent.
– **Slope Calculation:** Ensure there is a sufficient drop from the starting point to the end point. A slope of 3-5% is ideal for a moderate speed; adjust according to rider preference and experience.
Step 2: Setting Up Anchors
– **Anchoring to Trees:** Wrap the slings or padding around the trunks of sturdy trees. Attach your cable with wire clamps. Ensure the slings are set at an appropriate height, factoring in the sag of the cable, typically around 10-12 feet for a backyard zip line.
– **Using Posts:** If trees are unavailable, use treated wooden or metal posts buried deep into the ground. Secure them with concrete for added stability.
Step 3: Installing the Cable
– **Attach the Cable:** Fix one end of the cable to the higher anchor point using a wire clamp.
– **Run the Cable:** Unroll the cable to the lower anchor point. Use a turnbuckle on one end to adjust the tension. The cable should be taut but with a slight dip to allow for rider weight and smooth motion.
Step 4: Adding the Pulley and Safety Gear
– **Pulley System:** Attach the pulley to the cable, ensuring it glides effortlessly. Test the smoothness by running it along the length of the cable.
– **Safety First:** Attach a harness to the pulley with strong, secure carabiners. Always ensure the harness and helmet are worn by riders.
Step 5: Installing a Brake System
– **Spring Brakes:** Commercial spring brakes are effective for backyard zip lines, creating resistance as the rider approaches the end of the line.
– **DIY Brakes:** Alternatively, a piece of old tire or bungee cord attached near the end can serve as a makeshift brake. Ensure it is firmly anchored and provides sufficient stopping power.
How to Ensure Safety and Maintenance
Routine Safety Checks
Safety should always be your top priority. Conduct routine checks of the zip line before each use:
1. **Inspect Cables and Clamps:** Look for any wear and tear, rust, or loosening of components.
2. **Check Anchors:** Ensure the anchor points are secure and show no signs of deterioration.
3. **Test the Pulley and Harness:** Ensure the pulley moves smoothly and the harness is in good condition.
Regular Maintenance
– **Lubricate Moving Parts:** Keep the pulley and any moving components well-lubricated to ensure smooth operation.
– **Adjust Tension:** Periodically check and adjust the tension of the cable to maintain the proper slope.
– **Replace Worn Parts:** Promptly replace any worn or damaged parts to avoid potential accidents.
Conclusion: Embrace the Adventure!
Building a zip line can transform any ordinary outdoor space into an exciting adventure playground. By following these steps on how to make a zip line, you can ensure both fun and safety for all riders. Take the time to plan, install, and maintain your zip line, and you will be rewarded with countless hours of high-flying entertainment. Now that you have the know-how, it’s time to unleash your inner adventurer and master the thrill of your very own zip line!